May 10, 2011

My Favorite Local Faire

Hello Friends~ ~ ~
Quaint and beautiful little house. Actually it is an 1800's tavern. It is a part of the Landis Valley Museum. If you ever get to Lancaster County, PA. be sure to visit the museum. What it is is a small village built in the 1800's by John Landis and his family. These two pictures are of the tavern.

This building is just behind the tavern. Beautiful stonework. The Pennsylvania Germans are an industrious bunch, of which I am a descendant.


Every Spring they host an Herb Faire during Mothers Day Weekend. It is my favorite faire to visit. For many years it was the only place locally to purchase heirloom vegetable plants. They really do taste better than the newer varieties. Try them if you haven't.


This Celsiana rose is one of the oldest varieties known. I was told it's first recorded appearance was in the 1500's. Three years ago I purchased this rose and it is now four feet tall with some canes growing to 8 feet and into it's neighbor a Crepe Myrtle. The fragrance is amazing.


The vendor selling these old roses is dependably at the faire every year as so many others are.


This is so much fun. It is the kitchen in the tavern. All day they demonstrate cooking.


How would you like to cook in this kitchen?
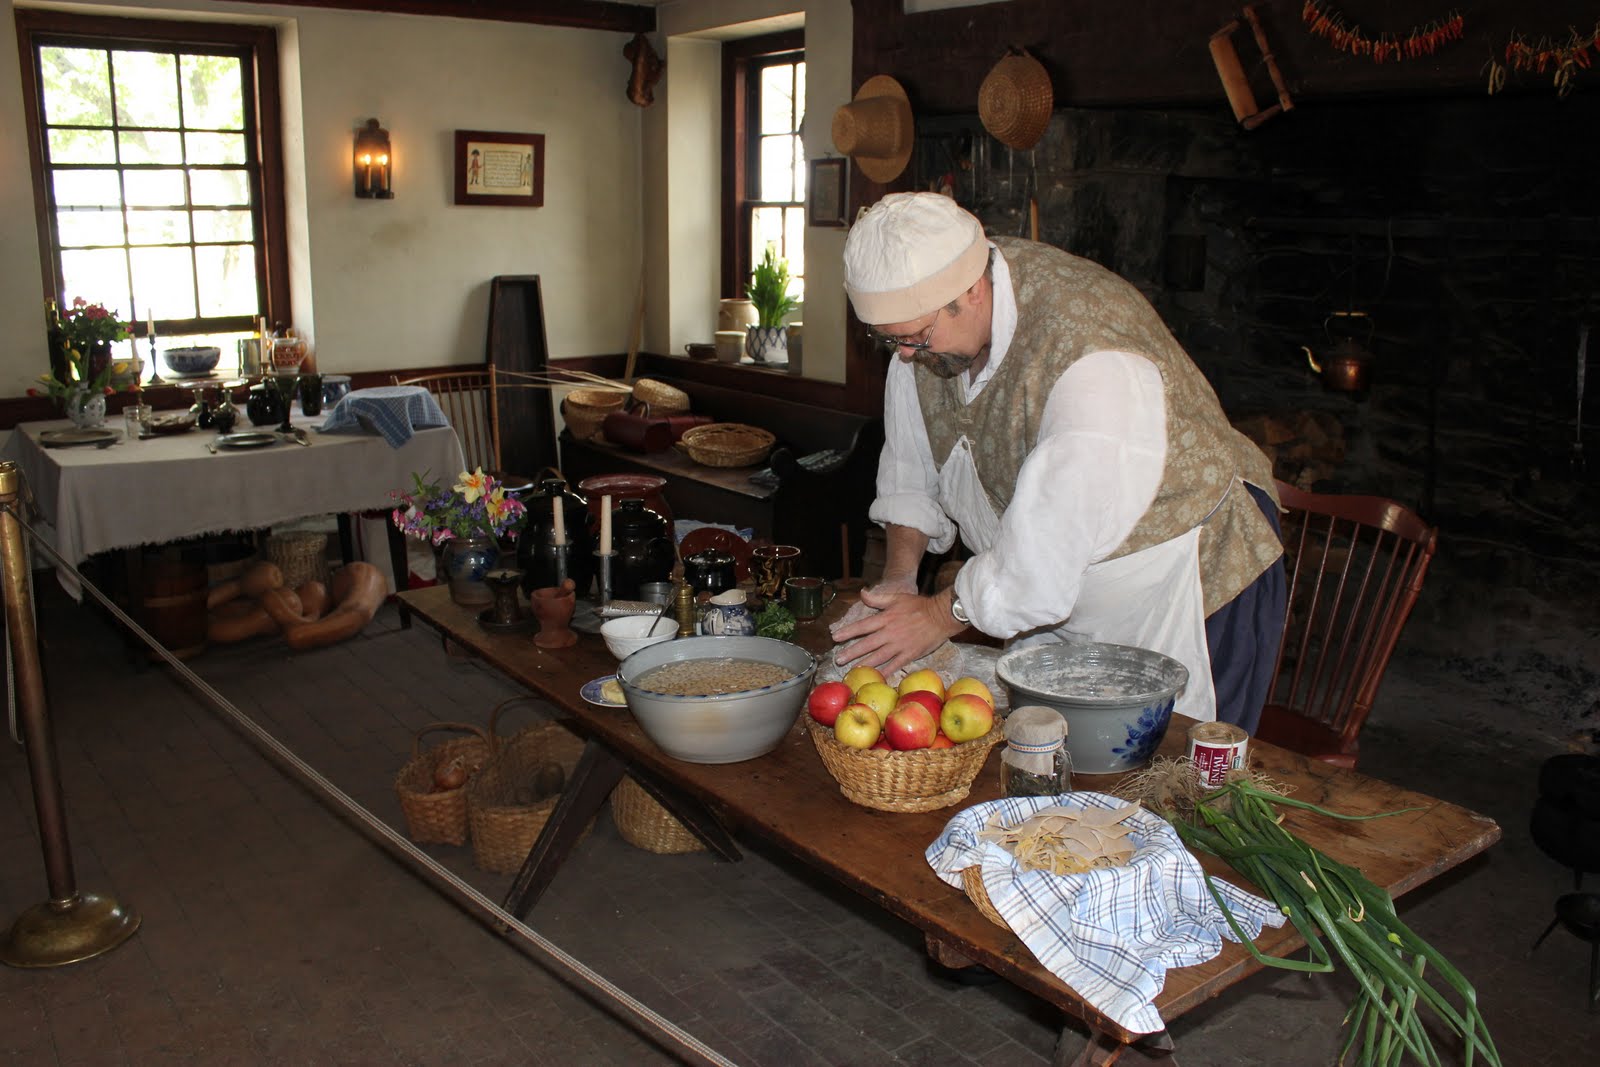


Making Bread.


How about this state of the art 1800 toaster?

I didn't notice the electric cord till I got home and looked at the pictures.


The fire for the oven is out back.

Honey, would you run outside and put another log in the fire

so I can bake the bread.


The homes in this village are beautiful.


Notice the man making and selling brooms by the fence.


Most of the homes are opened for viewing.


The building above is the General Store. It is stocked with antiques of the era.
Each home has a knowledgeable host inside to tell you the story of the home.


These next few shots are of the home of John and Elizabeth Landis founders of the village. The brick beauty above is the Landis home.


Lovely fireplace in the parlor.


The kitchen, love the colors.


One side of the home is a combo of brick and stone.


Looking down the street toward the faire.


Beautiful old shutters.


We had so much fun and I did purchase the Graham Thomas rose that I was searching for. What joy!


Hope you enjoyed the tour.


I am linking to these fun parties this week:

Foodie Friday


See you again soon.


~ ~Ahrisha~ ~

May 2, 2011

Can You Solve This Riddle?

When is a rose not a Rose but


A Gourmet Delight?

Give up?


When It is A Julia Child.
That is the name of this delicious little rose.


Of course with my love of food and cooking


I had to buy it!

I went to the local greenhouse to purchase a Graham Thomas Rose. After seeing all the beautiful pictures in Blogland I was smitten. Alas, no Graham Thomas. GT is also a yellow rose and yellow roses are my favorites. Then I spied this beauty and when I saw the name, well, you know how it is.

This picture is the metamorphosis, the fresh young bud and the tattered old flower.


This is what the tag on the rose had to say about her.


All roses are female ~ ~ Right?


Butter Gold - Floribunda 2006

Just before our wonderful American icon left us, she selected this exceptional rose to bear her name. Julia loved the even butter color and the licorice candy fragrance. Yet it wasn't just the old-fashioned blooms that inspired the recipe. The perfectly rounded habit, super glossy leaves and great disease resistance finished off the dish. An awesome AARS award winner-a right and proper honor for a dear friend.


Isn't that lovely?


I adore roses that show their centers. Many of the tea roses do not when they open. I love the contrast between the silken petals and the wirey stamens in the center.


The rose is only about 4" across but I love the shabby ruffled look of it.

How about you. Do you prefer a perfect rose to a shabby one?


Since we are talking roses, here is a hint for you when cutting a rose or trimming your rose bushes. When you cut a stem look to see which side of the stem the next 5 leaf, not 3 leaf stem is. Always make a cut just above a 5 leaf stem. Now, since the new branch will form opposite the 5 leaf stem, will it be growing in the direction you would like to see it grow. If you want it to grow inward to fill out the bush, great. Maybe you want it to grow outward to even out and fill out that side of the bush. Not rocket science but a good tip.


Hope you enjoy this flavor of Lancaster County.


One of our many covered bridges.


I am linking up to these partys this week.


Please visit them for more great posts.


Have a Delightful week!


~ ~Ahrisha~ ~

April 14, 2011

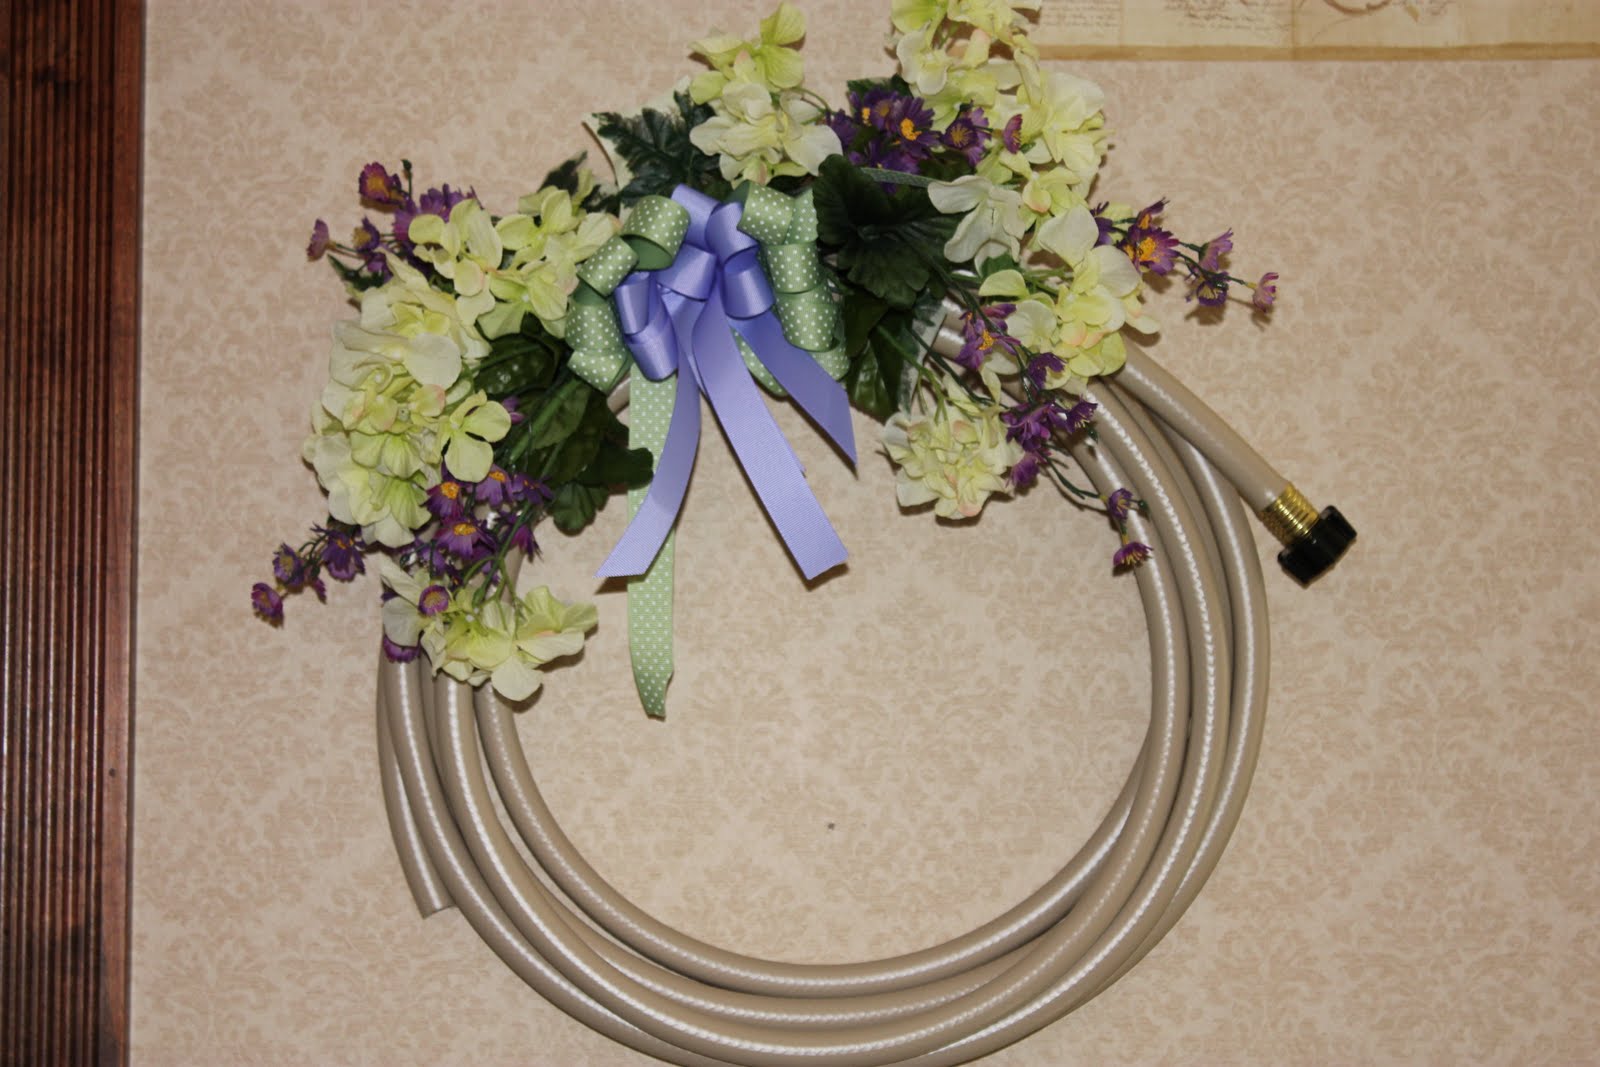
Recycled Water Hose Wreath

Hello Friends~ ~ ~ Last week I posted a picture of a water hose wreath I made for my garage door. My neighbor saw it and went crazy and asked me to make one for her. This is the wreath I made for her and pictures of the steps as I was in construction mode. I know many of you are really great at arranging flowers and making wreaths but for those of you who could use a little help here you go.

First of all I would like to introduce my assistant Mr. Handsome. He is always around when there is a craft project in the works. It would go faster without his help but I just love his sweet face so much. . .what can I say?

I didn't have the color flowers I wanted on hand so I needed to make a trip to the Dollar Tree. They have the best buys around for silk flowers. Above is what I bought and I didn't use all of them. I got $6.00 worth! The ribbon was from last weeks wreath.

First step: Wrap your hose into a big circle the size you desire. I like the end to show so I work it to the top right of the wreath and wire it together at the top. Leave enough wire to form a loop for hanging. Cut the remaining hose off with a sharp knife.

This is two bunches of flowers that I bent so that they would curve around the hose. Don't cut them apart just tuck each end into the flowers of the other.

I wanted these purple stems on the bottom peaking out at the ends. I used one bunch and bent 3 stems to the left and 3 to the right.

Place the hydrangea on top and use a few purple stems cut from the second bunch on top and wire the whole thing together.

I like to wire all the flowers together and then attach them to the hose or wreath. Later in the season if the flowers get shabby and I want to change them I can just cut the wire, remove them and add another bunch. Simple and I often do this.

The ribbon. Of course you can use any ribbon you like and wired is probably the nicest looking but I just wanted a floppy casual looking bow. The green ribbon is for the bottom of the bow and the lavender will be the top. Cut a piece about 12" long from the top ribbon.

Form it into a loop for the center of the bow. Run a piece of wire about 10" long through to the center of the wire and twist a couple of times. Leave long ends of the wire to attach this center piece to the rest of the bow.

Take the rest of the top ribbon and just loop it back and forth till you have a little bow of sorts.

Place your center on top and pinch the center of the bow together while twisting the wires tight. Leave the ends to attach the bottom part of the bow.

I just looped the bottom ribbon back and forth till I had the size to fit my bunch of flowers. Then layered the top bow on and wired the whole thing together. It's best to pull your wires as tight as you can so that the ribbon stays and the more it's pinched in the center the better it looks.

OK friends, here is where your design style comes into play. Check out the wreath above and below. Compare them and you will notice that the top wreath needed a little adjustment. See how the flowers all just stick out left and right. Style it up a bit by bending the stems and bending just the flower ends so that they face the front.

See how I bent some of the hydrangea closer to the bow and faced them forward. Much nicer. Don't be afraid to bend them around. If it is too full for your taste you can even cut a few flowers out. If you check out my last post this wreath is much fuller than the last one. Make it to suit your taste. Hope my neighbor likes it. I'm off to deliver it to her.


This week I'm linking to:

Share The Love Wednesday at Very Merry Vintage Style.

Sweet Mary featured last weeks wreath on her blog and I was thrilled.

The Shabby Chic Cottage; Transformation Thursday

 
Romantic Home; Show and Tell


Spring Party at Decor To Adore~ Laura

I appreciate each of you.
Thanks for stopping by,
~ ~Ahrisha~ ~

April 6, 2011

Spring Brings New Life

And Me back to the blog.

Sorry to have deserted you.

I am back and looking forward to new passions in my life.

How about you?

Do you like my new wreath?

Does it look familiar?

Look closely~ ~Then grab an old garden hose

and make one yourself.

This one is hanging on the garage door.

Isn't this a great old basket?

It's very old and belonged to a friend of mine.


I hope you will leave a comment and

stop back soon to share in the new Springtime events.


It's good to be back. Even though I was not

posting I was visiting all of you to

keep up with your blogs.


I'm linking with Transformation Thursday at


Show and Tell Friday at


Favorite Things at


Show Off Your Cottage


Share The Love Wednesday


Met. Monday @ Between Naps On The Porch


Happy Spring!


~ ~Ahrisha~ ~

December 13, 2010

Over The Moon~ ~ About A Dish

Greetings Friends~ ~ ~

You are the only ones I can share this with. I know that you will understand because you have probably been there. I opened the box and my heart skipped a beat when I saw this.
Have you ever purchased from www.csn.com ? A few days ago I saw this covered casserole on their site and I had to have it.

Last night I baked my corn casserole in it and it was delish. Having an attractive lid is a real plus. I can keep it warm at the table and not have to deal with foil.


I adore this dish because it's not white but a creamy white shade with brown antiquing around the bow on top. So sweet.


The casserole didn't last long. I like this as a side dish or a light meal with a salad and bread as we had it last night. It's simple to make and while it's baking you can whip a salad together.


This sweet bow of a handle just makes the dish perfect.
Go to www.csn.com and search for Pamela Gladding Ivory
round baker with lid. It's on sale right now!
Cheesy Corn Spoon Bread
4 oz. Butter
8 oz. cream cheese
Microwave in bowl to melt slightly 1 minute
Add remaining ingredents and mix well
1- 15oz. can corn drained
1-15 oz. can Creamed Corn
3 eggs
1 med. onion, minced
6-8 oz. pepperjack cheese grated or chopped small
12 oz. Pepperage Farms corn bread stuffing
1/4 C chopped parsley
Pour into well buttered casserole
Bake 375* ABOUT 45 MIN.
till center is firm


Serve in this lovely dish.


I also purchased these sweet little ramekins.
I can see my creme brulee in these.


These are from www.csn.com also.
Bon Jour Stoneware 4 piece set in chocolate.


Thanks for stopping by for a visit.
I've been having 'puter problems so I was not able to post.
Thanks for hanging in there.
Love to all of you
~ ~Ahrisha~ ~